- High-throughput ingestion: Cloudflare Pipelines can handle massive scale, processing tens of thousands of requests per second via Cloudflare’s global network.
- Zero egress fees: With Cloudflare R2, you never pay to access your data regardless of how much you query or where you analyze it from.
Prerequisites
You’ll create a Webhook Sink that’ll deliver a database change to a Cloudflare Pipeline. You’ll need the following to get started:- A Cloudflare account
- The Cloudflare CLI installed
- Sequin running locally
- A database connected to Sequin with at least one table
Sample database schema used in this guide
Sample database schema used in this guide
Setup a Cloudflare Pipeline and R2 Bucket
Create a Cloudflare pipeline with an HTTP source and an R2 bucket destination.1
Create a new R2 bucket
Run the following command to create a new R2 bucket called
sequin-r2-bucket:2
Create a new pipeline
Create a pipeline connected to the R2 bucket you just created:This will create a new pipeline called Copy down the
sequin-pg-sink with a simple configuration to get you started. You’ll see the following output:Endpoint URL, you’ll need this to setup the Sequin Webhook Sink.You’ve created a Cloudflare pipeline and R2 bucket ready to process JSON data over HTTP.
Setup a Sequin Webhook Sink
Now that you’ve setup a Cloudflare pipeline and R2 bucket, you can setup a Sequin Webhook Sink to deliver changes to the pipeline.1
Create a new webhook sink
In the Sequin console, navigate to the Sink page and click “Create Sink”.Then, select “Webhook” as the sink type.
2
Select the table(s) to sink
Select the the table(s) you want to sink (i.e.
public.users).3
Transform the payload for the Cloudflare pipeline
The Cloudflare pipeline expects JSON objects wrapped in a single array. To achieve this, you’ll need to add a transform to the sink.Skip down to the “Transform” section and click the + Create new transform button.In the “New Function” page that opens, name your function This function will wrap each JSON object in a single array as required by the Cloudflare pipeline.Click “Create Function” to save the function.Navigate back to the Webhook Sink form, click the refresh button in the “Transform” section and select the
cloudflare-pipeline-transform with the type set to Transform function. Then, add the following code to the function:cloudflare-pipeline-transform function you just created.4
Turn off batching (for now)
In the “Webhook Sink configuration” section, turn off batching.
We’re working on features to support batching for Cloudflare pipelines. For now, you’ll need to turn off batching to deliver each change to the pipeline individually.
5
Create an HTTP endpoint for the Cloudflare pipeline
Skip down to the “HTTP Endpoint” section, click New HTTP Endpoint and in the new window, name the endpoint (e.g. No need to add any headers or authentication right now.Then, go back to your Webhook Sink form, refresh the list of endpoints, and select the endpoint you just created.
cloudflare-pipeline-endpoint) and enter the url for your pipeline:6
Save the webhook sink
Give your webhook sink a name (e.g.
cloudflare-pipeline-sink) and click “Save” to save the webhook sink.You’ve setup a Sequin Webhook Sink that’ll deliver changes to a Cloudflare pipeline.
Test a single change
Now that you’ve setup a Sequin Webhook Sink that’ll deliver changes to a Cloudflare pipeline, you can test it by creating a new user in the database.1
Create a new user in the database
Create a new record in the table. For example, you can run the following SQL command to create a new user in the database:
2
Check the Cloudflare pipeline
Using the Cloudflare dashboard, you can check the R2 bucket for the new user: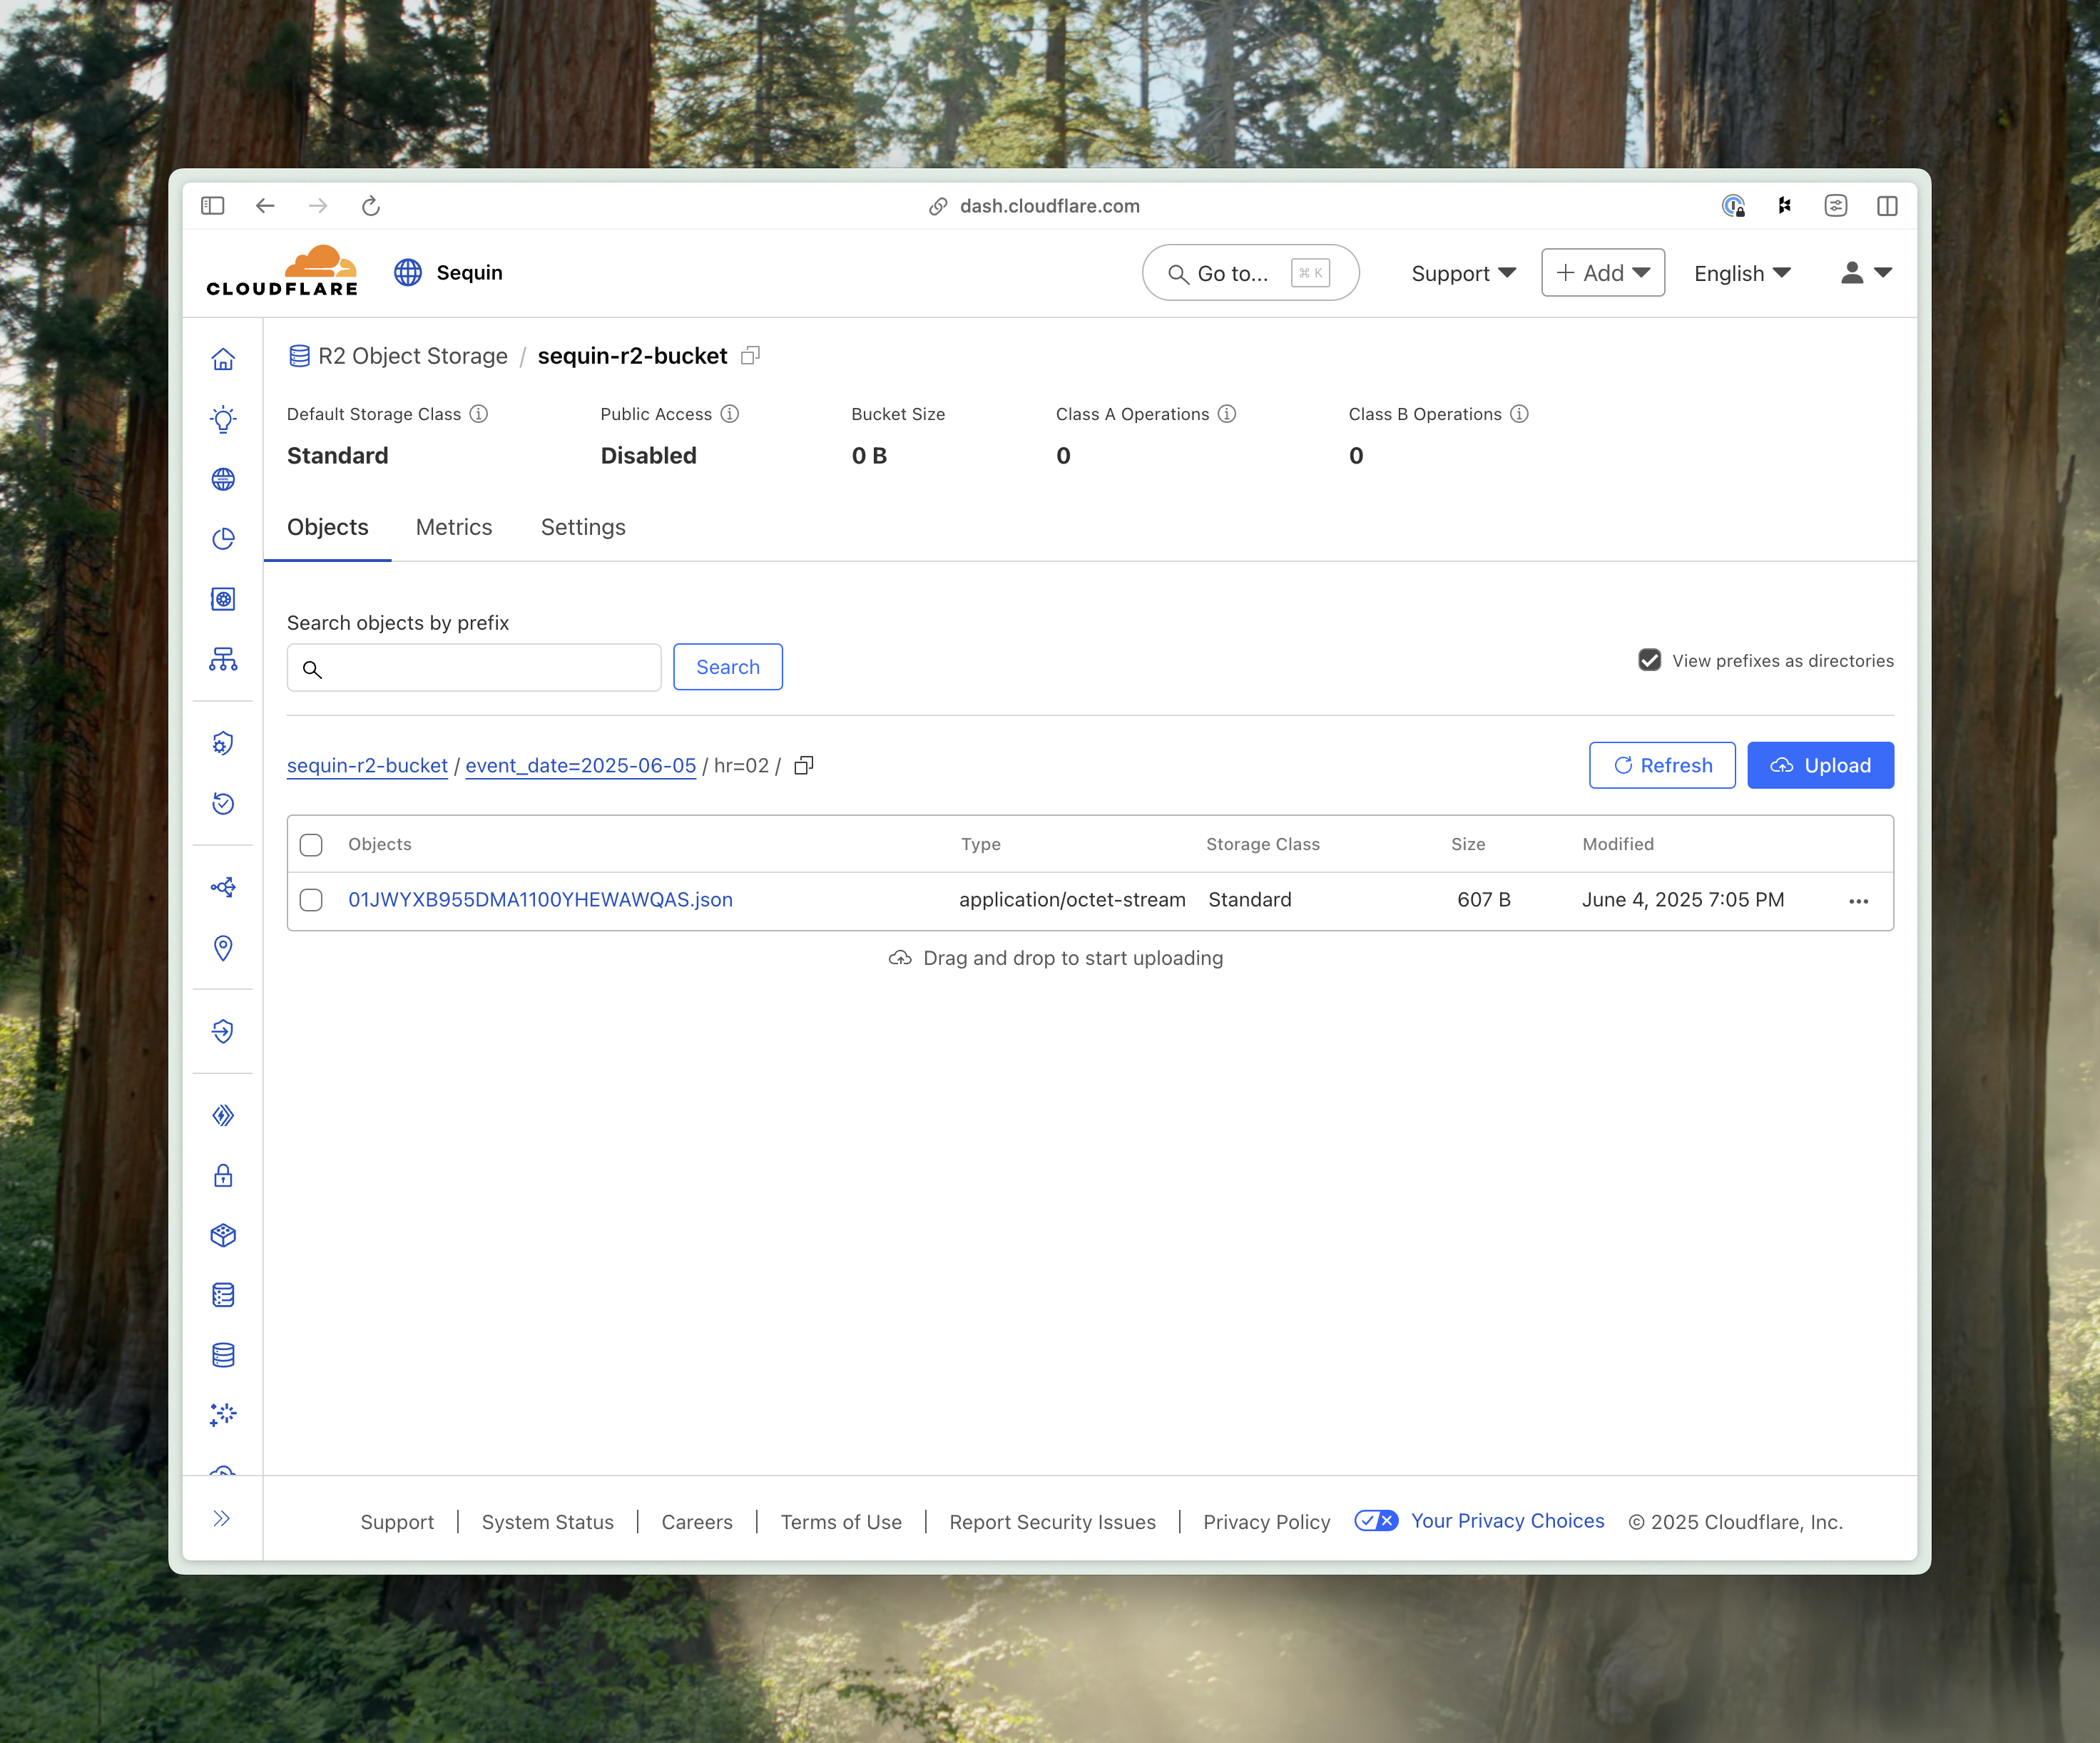
You’ve successfully seen a change from your database delivered to a Cloudflare pipeline and landed in an R2 bucket.
Next steps
You are up and running with a Cloudflare pipeline and R2 bucket that’s capturing every change in your database. You can use this sink to power a data lake or analytics (Iceberg, Delta Lake, etc.), long-term archival, or for audit and compliance use cases. To build on this example, dig into the following resources:Connect your production database
Learn how to connect your production database to Sequin.
Deploy Sequin in production
Learn how to deploy Sequin in production.
Webhook sinks
Learn more about how to configure your webhook sinks to deliver messages to your users.
Monitor your workflows
Learn how to monitor your system with Sequin’s built-in metrics.