Prerequisites
You’ll create a Sequin Webhook Sink that’ll deliver a webhook to a Node.js worker whenever a user is deleted in your database. You’ll need the following:- Sequin installed and running locally
- A Postgres database connected to Sequin
- A working understanding of Temporal’s TypeScript SDK - including Workflows and Workers
- Node.js installed on your machine (if you want to run the code examples)
Setup your database tables
Start by creating a mock users table. In the Postgres database connected to Sequin, run the following SQL:Setup a Webhook Sink in Sequin
Now, you’ll setup a Sequin Webhook Sink that’ll deliver a webhook to a Node.js worker whenever a user is deleted in your database.1
Create a new webhook sink
In the Sequin console, navigate to the Sink page and click “Create Sink”. Then, select “Webhook” as the sink type.
2
Select the users table
Select the
users table you created in the previous step as the source table.3
Filter for the delete operation
In the “Filter” section, add a filter to ensure the webhook is only delivered when a user is deleted by turning on the “Delete” filter, and turning off the “Insert” and “Update” filters.
4
Configure the HTTP endpoint
Skip down to the “HTTP Endpoint” section, click “New HTTP Endpoint” and in the new window, name the endpoint (e.g. No need to add any headers or authentication right now. Then, go back to your Webhook Sink form, refresh the list of endpoints, and select the The fully qualified endpoint is now:
temporal-worker) and enter the following url:temporal-worker endpoint you just created. As a last step, add the following path to the endpoint:http://localhost:3333/delete-user5
Save the webhook sink
Give your webhook sink a name (e.g.
temporal-webhook-sink) and click “Save” to save the webhook sink.Sequin is now watching for deletes on the
users table and will deliver a webhook to http://localhost:3333/delete-user whenever a user is deleted.Scaffold a TypeScript Temporal Worker
With Sequin setup and ready to deliver webhooks, you can now scaffold a TypeScript Temporal Worker. Temporal provides a handy CLI tool to scaffold a new worker project. Run the following command to create a new worker project:sequin-cdc-to-temporal with a basic Temporal worker project:
src/server.ts file and installing the express package:
The Temporal server is now running and your project is ready for a workflow and worker to be added.
Create the Temporal Workflow
In this scenario, when you delete a user, you want to trigger a Temporal workflow to delete the user across multiple services and then send the user a confirmation email. In temporal you’ll define 3 things to achieve this:- Activities that define the individual tasks to be performed.
- A workflow that orchestrates the activities.
- A worker that will run the Temporal workflow when the Temporal task queue receives a task.
Define the delete user activities
In Temporal, activities are the individual tasks that make up a workflow. Define two activities in thesrc/activities.ts file with the following code:
activities.ts
cleanUpExternalSystems activity simulates the cleanup of a user’s data in external systems by delaying for 1 second. The second sendDeletionConfirmation activity simulates sending a confirmation email by delaying for 500 milliseconds.
Of course, in a real application, these activities would be replaced with the actual logic to clean up the user’s data and send the confirmation email. The power of Temporal is that even if these activities take hours, fail, or are interrupted, Temporal will ensure the workflow is retried and completed.
Orchestrate the activities in a workflow
Now, you’ll orchestrate the activities in a workflow. Define a workflow in thesrc/workflows.ts file with the following code:
workflows.ts
userDeletedSignal (that’ll be triggered by the webhook from Sequin). It then runs the two activities and completes. Importantly, the workflow also defines how to handle and retry failed activities - in this case, the workflow will retry the activities up to 5 times.
Using a long-lived workflow triggered by a signal builds on the suggested architecture from Temporal. You could just as easily build a workflow that starts each time a webhook is received and completes after the activities are run.
Define the worker to run the workflow
With your workflow defined, setup a worker to listen to the Temporal task queue and run the workflow. First, in thesrc/shared.ts file, define a constant for the task queue name:
shared.ts
src/worker.ts file, define the worker:
worker.ts
Define the HTTP server to receive the webhook
Finally, define the HTTP server to receive the webhook from Sequin and send the signal to the workflow when a user is deleted. In thesrc/server.ts file, define the server with the following code:
server.ts
/delete-user endpoint that Sequin will deliver the webhook to. When the endpoint is called, it triggers the Temporal workflow with a signalWithStart call.
Your temporal workflow is now defined and will be trigged whenever a webhook is delivered from Sequin.
Run the application
Now, you’re ready to run the application. Make sure the Temporal servers is still running:1
Sequin detects delete
Sequin captures the delete event from the database and delivers a webhook to the HTTP server: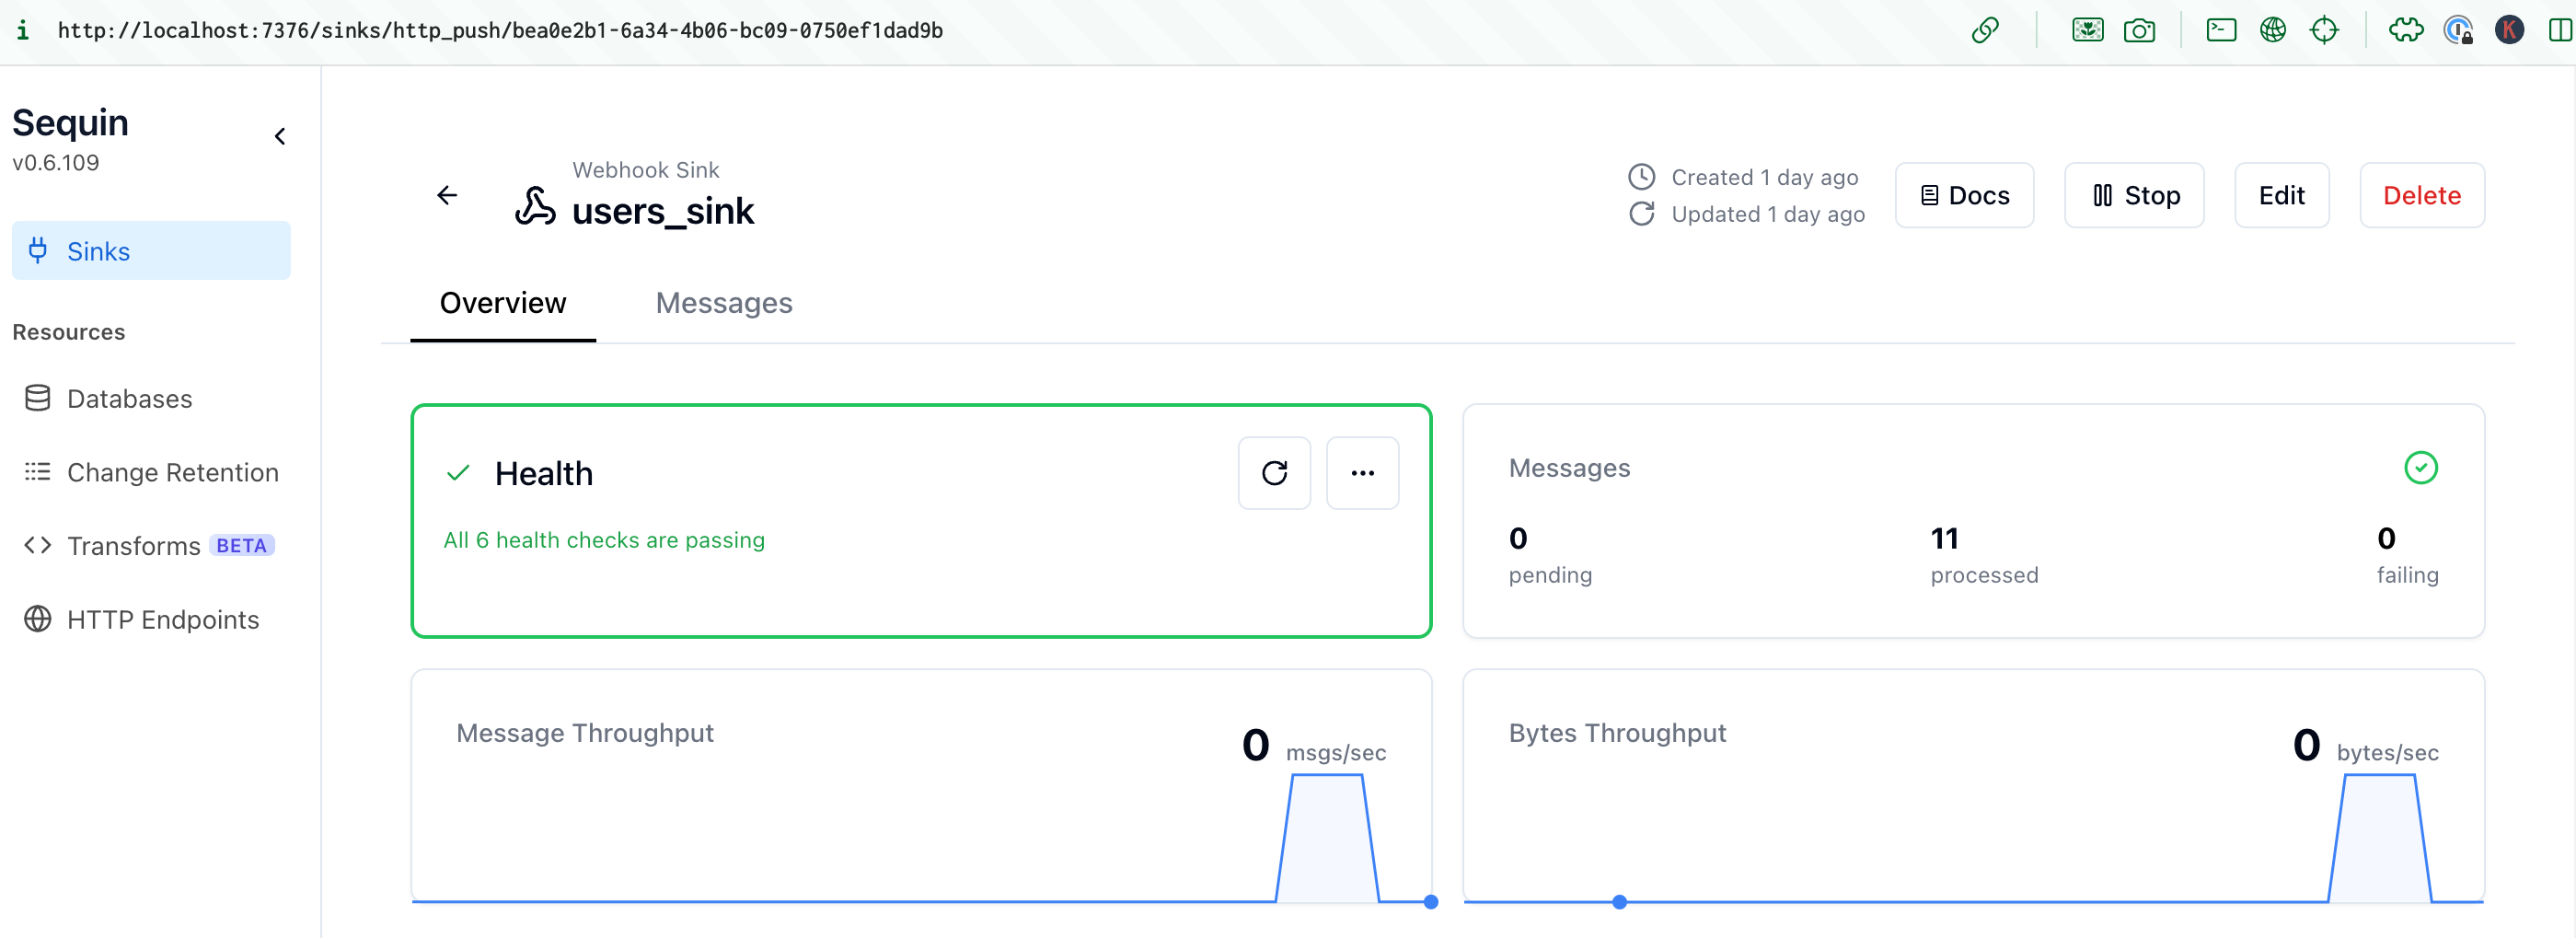
2
Webhook received
The HTTP server triggers the Temporal workflow with a
signalWithStart call:3
Temporal workflow starts
The Temporal workflow starts and runs the
cleanUpExternalSystems and sendDeletionConfirmation activities:4
Temporal workflow completes
The activities complete and the workflow completes. You can see the workflow complete in the Temporal UI: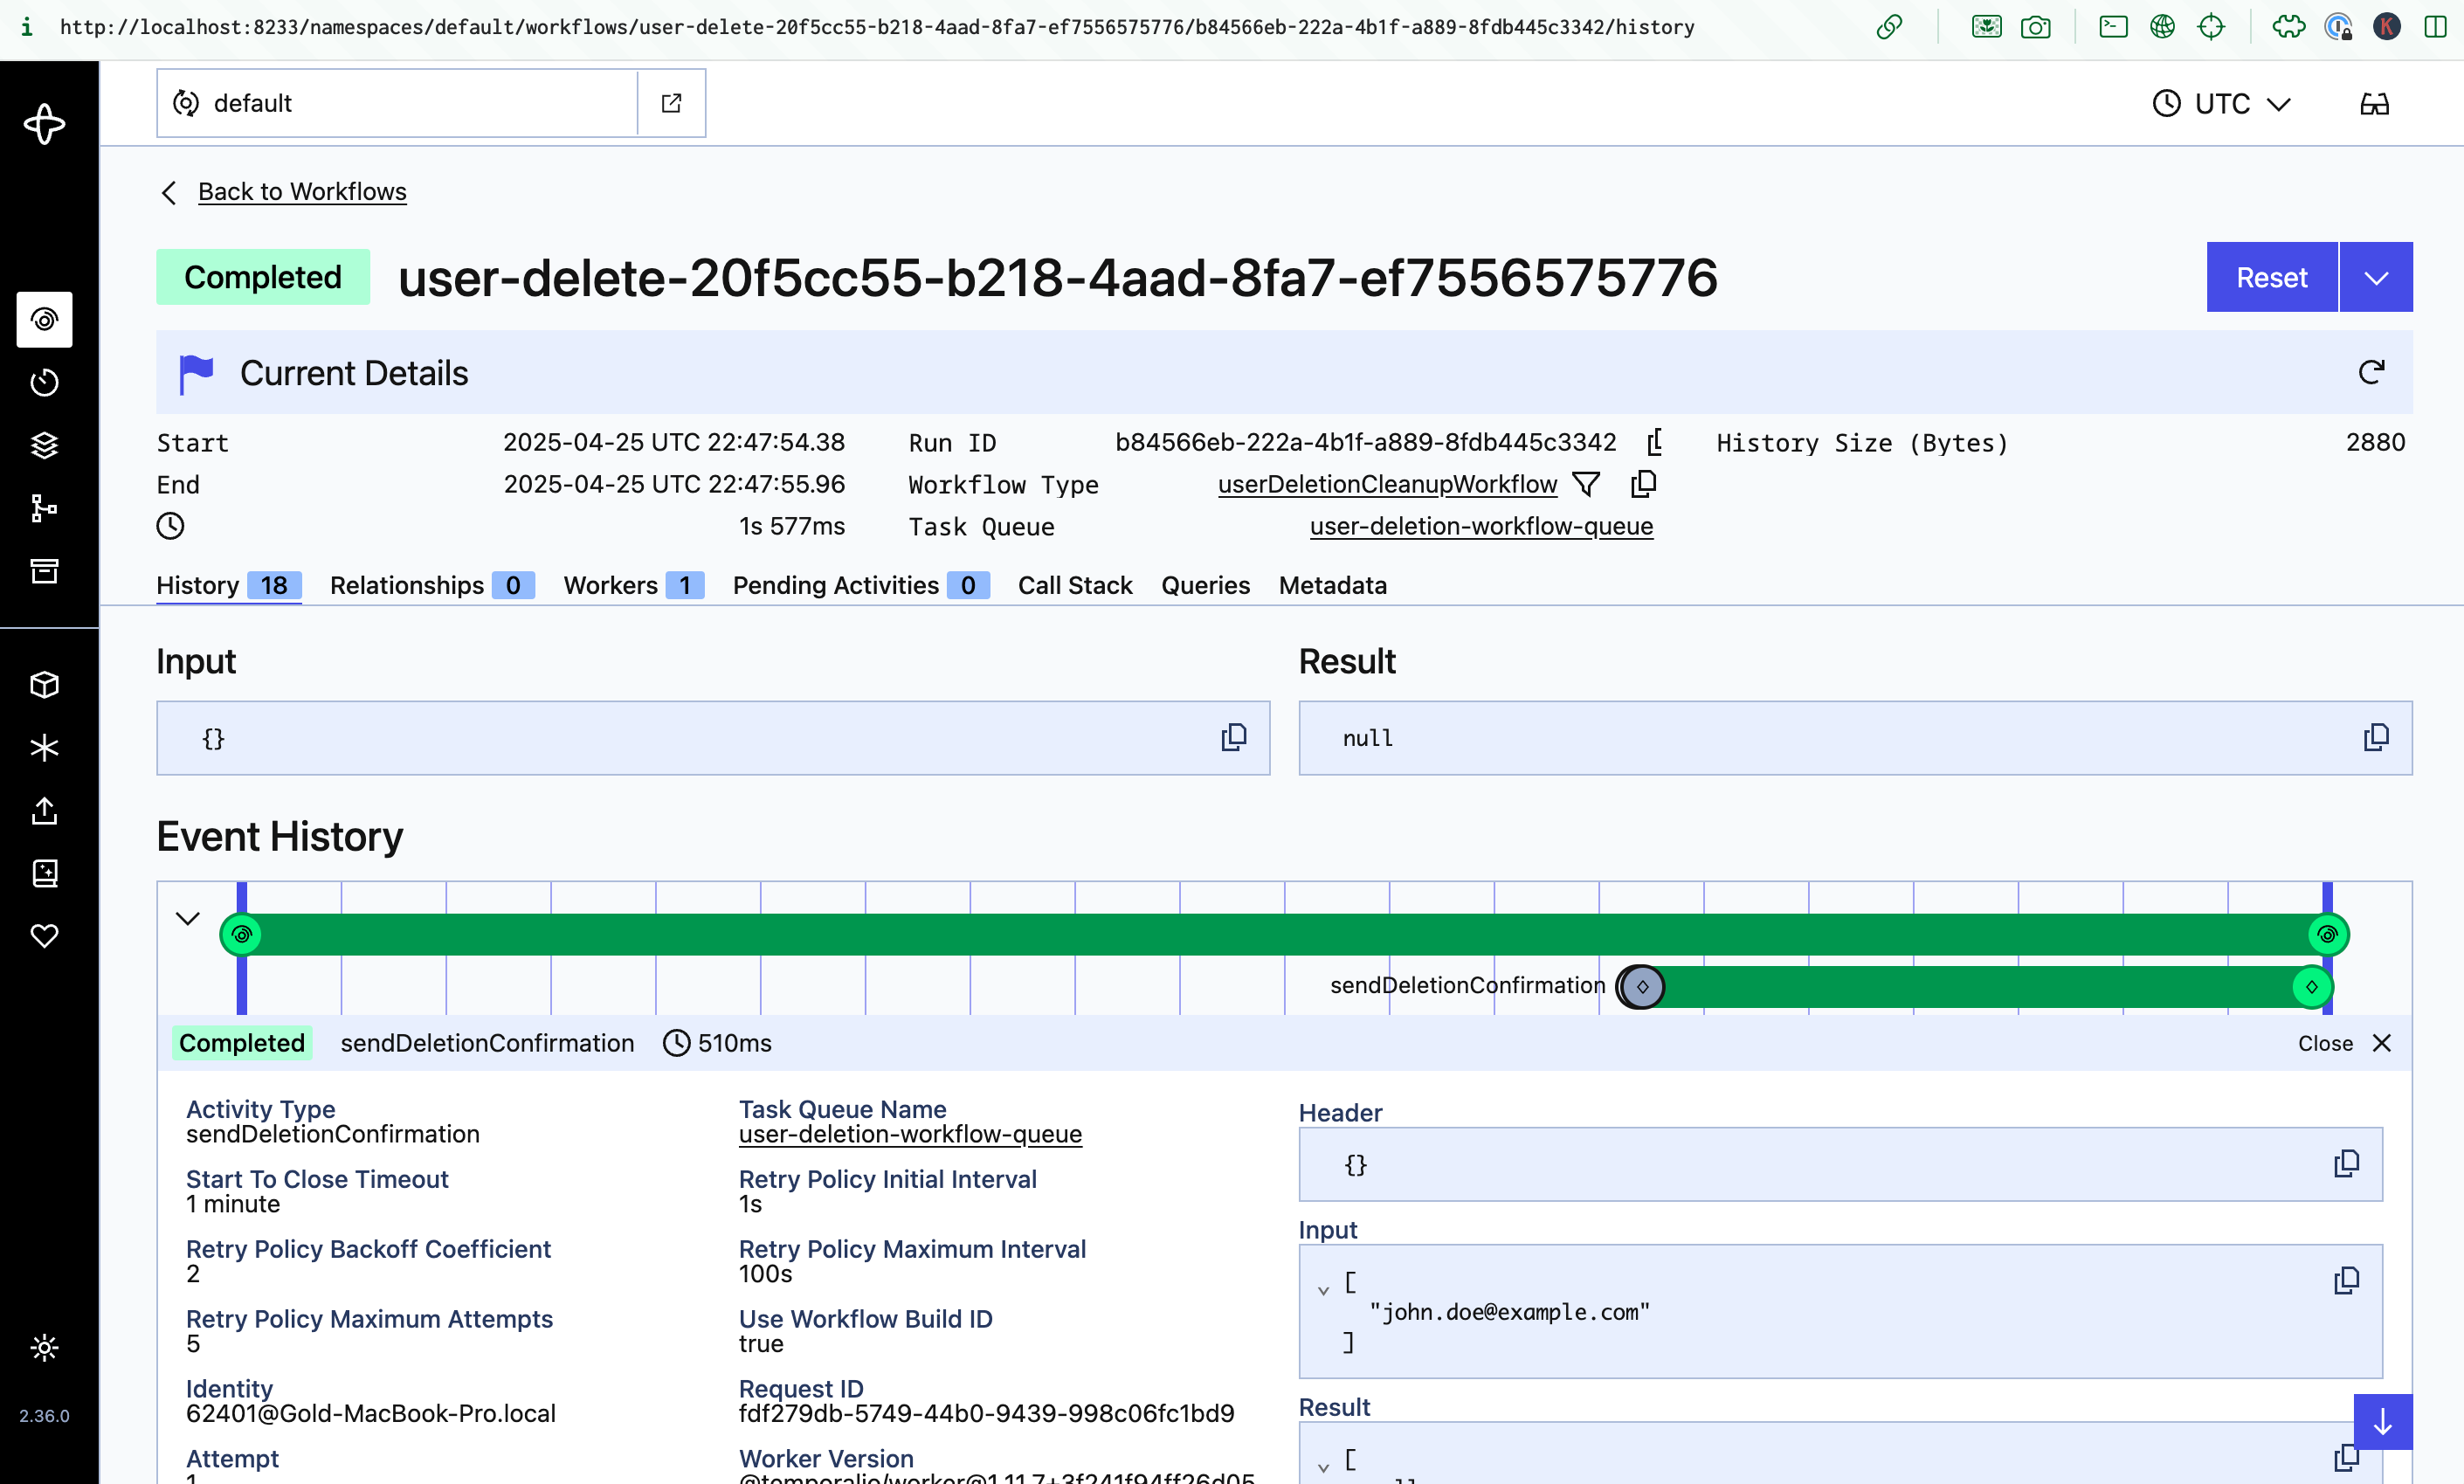
Every time a user is deleted in the database - no matter what service performs the delete - a Temporal workflow is triggered to delete the user across multiple services and then send the user a confirmation email.
Resources
The combination of Sequin and Temporal provides a powerful way to build complex, transactionally-consistent workflow. Together, you can be sure that changes in your database are always reflected across your application and services. To build on this example, dig into the following resources:Connect your production database
Learn how to connect your production database to Sequin.
Deploy Sequin in production
Learn how to deploy Sequin in production.
Webhook sinks
Learn more about how to configure your webhook sinks to deliver messages to your users.
Configuration reference
Learn about all the configuration options available in sequin.yaml.
Monitor your workflows
Learn how to monitor your system with Sequin’s built-in metrics.