
Prerequisites
You are about to create a local Inngest function that sends a welcome email to a user as soon as they are inserted into the database. Sequin ensures that every new userinsert triggers an Inngest event that your function can then process (i.e. exactly once processing guarantee).
You’ll need the following:
- An JavaScript/TypeScript project with Inngest installed
- Sequin installed locally
- A database connected to Sequin
Create an Inngest function
Start by creating a new Inngest function. The example below shows a function that sends a welcome email to a user when awebhook/user.inserted event is received.
Create a new function
In your This function takes the
functions.ts file (typically located in src/inngest/functions.ts), create a new function:webhook/users.insert event as input, extracts the user data, and sends a welcome email to the user.Add the function to `Inngest.serve()`
The
Inngest.serve() handler registers your function with Inngest so it can invoke the function.In your route.ts file (typically located in src/app/api/inngest/route.ts) register the function you created above:Trigger the function with a test event
Test the 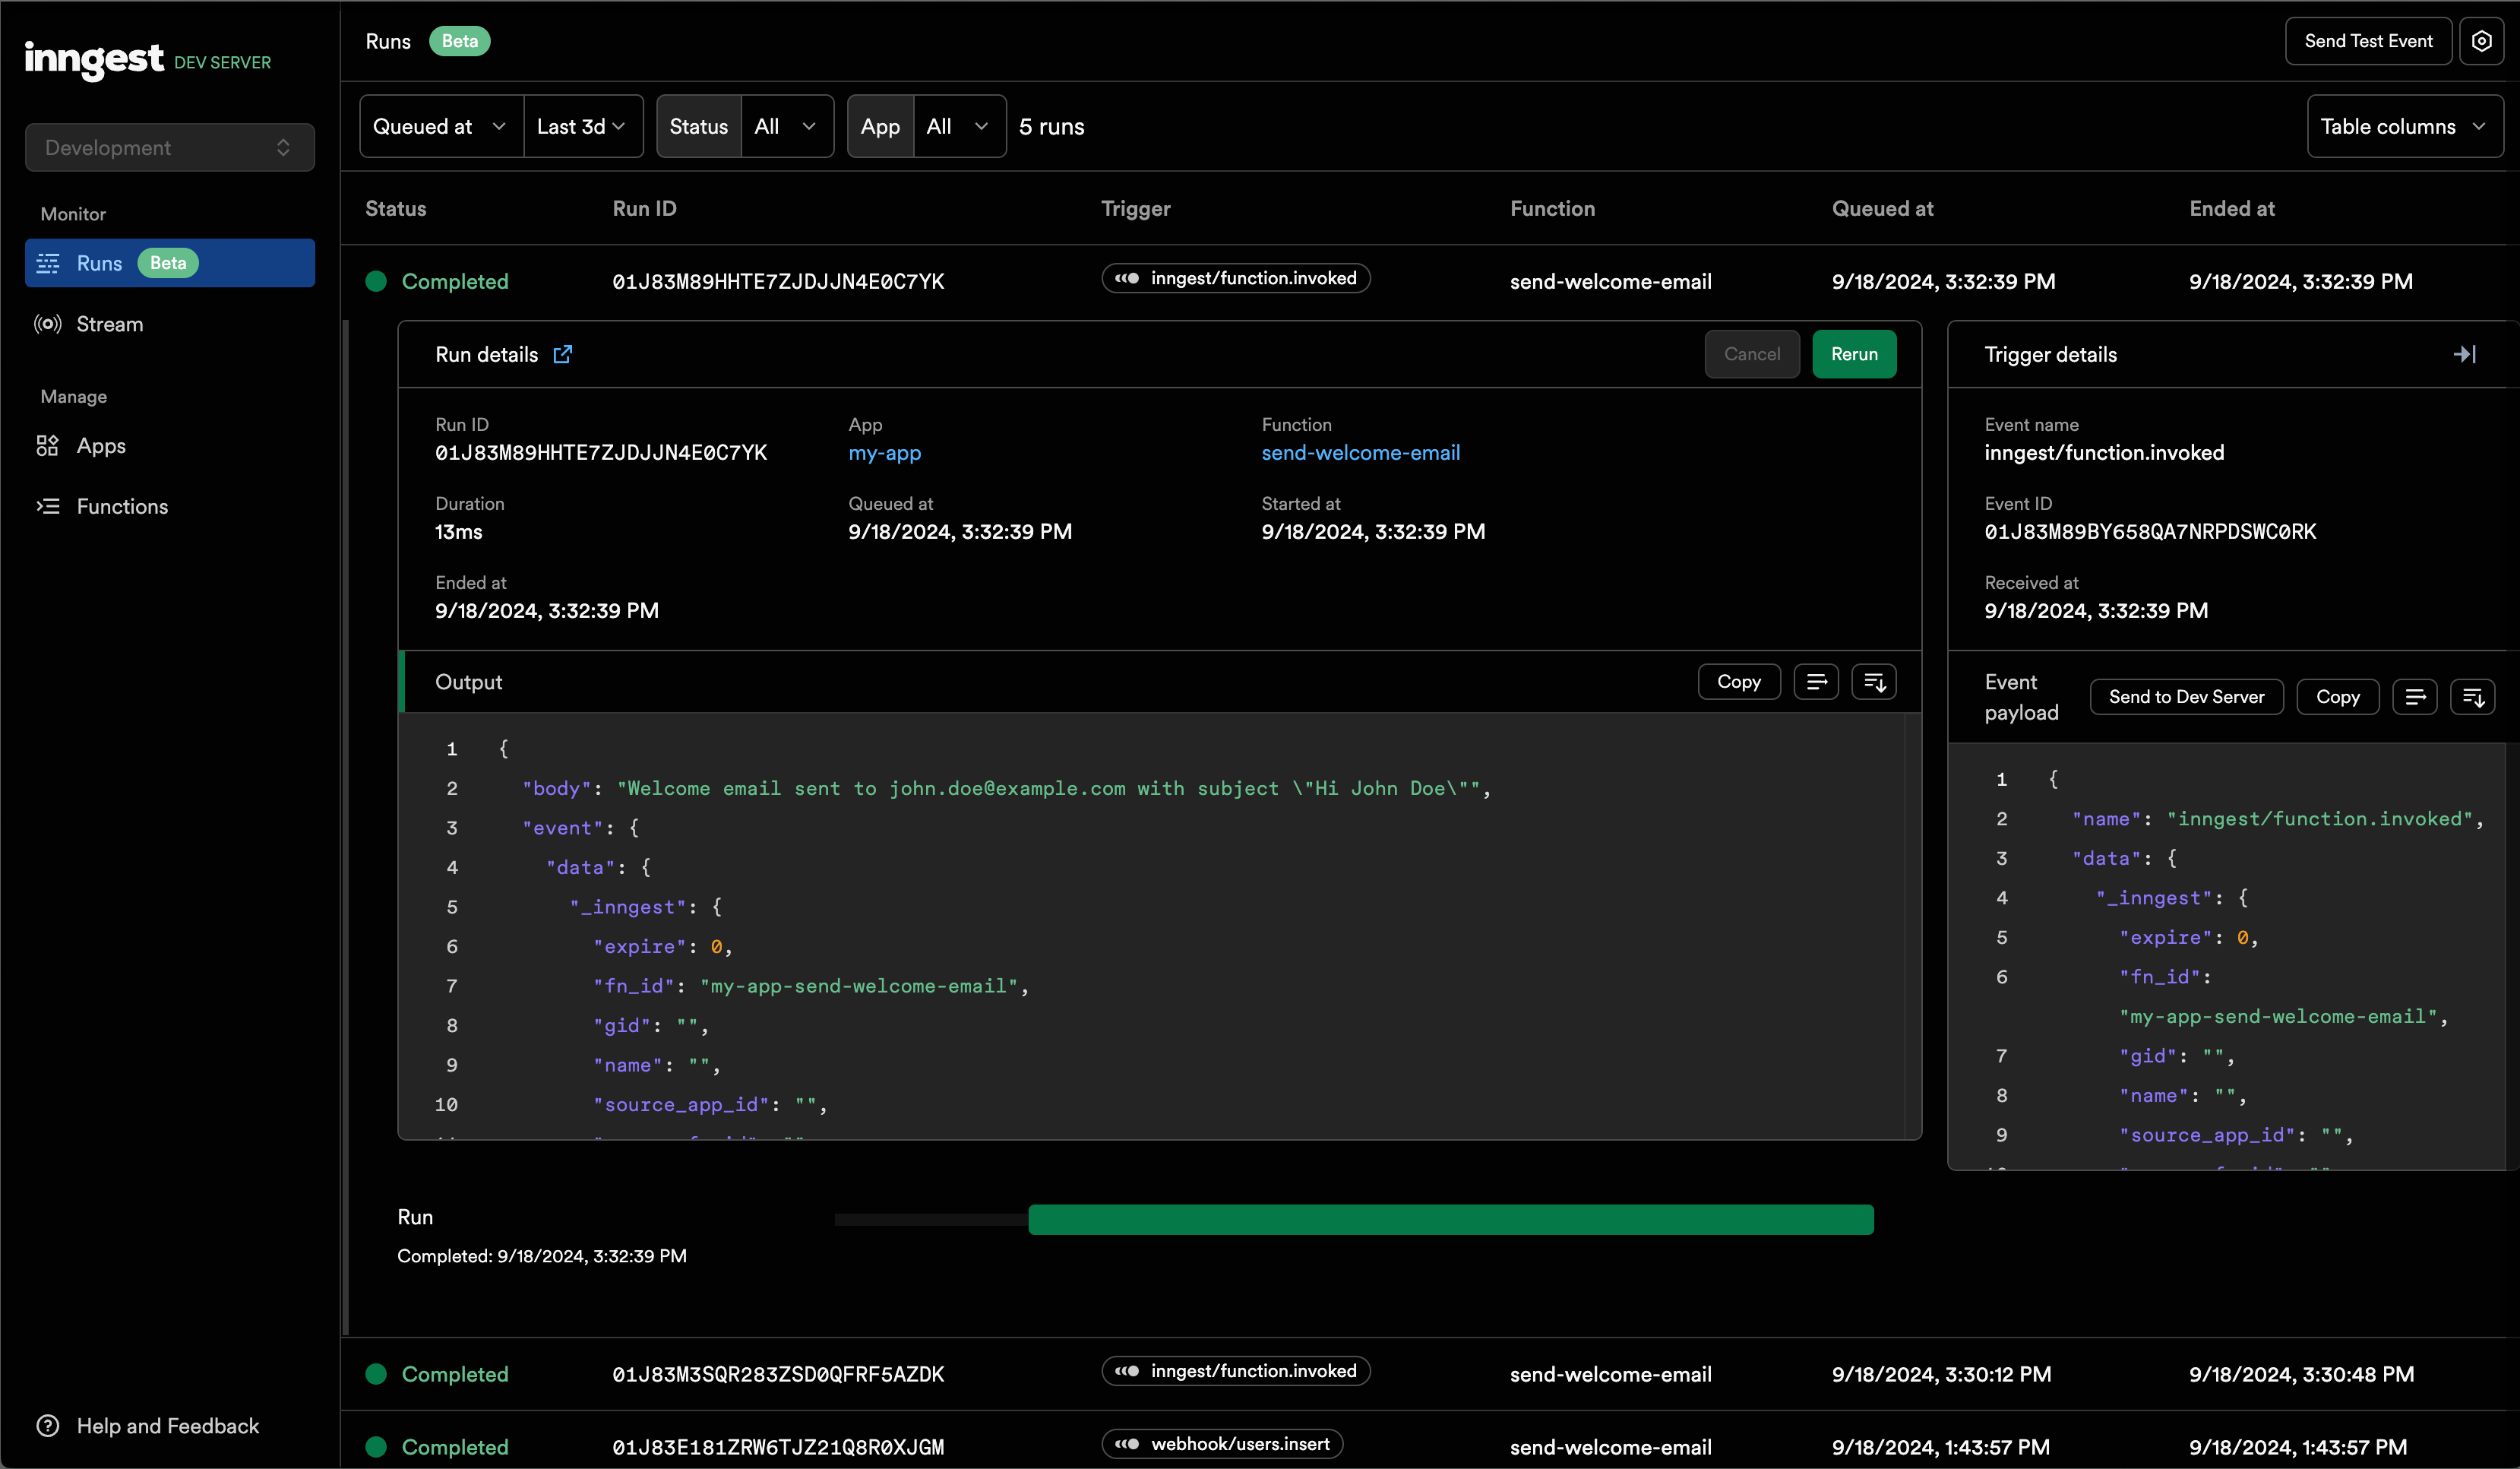
sendWelcomeEmail function by trigger a test eveng in the Inngest development server:- Run your Next.js project and Start the Inngest development server:
- Open the Inngest dashboard in your browser and navigate to the “Functions” tab.
- You should see the
send-welcome-emailfunction. Click the “Invoke” button and enter a sample event payload. For this example, use the following event payload: - Click the “Invoke Function” button and then navigate to the “Runs” tab. You should see the run you just triggered:
You’ve successfully created an Inngest function that sends a welcome email to a user when a
webhook/users.insert event is received. In the next step, you’ll trigger this event with Webhook.Create an Inngest webhook
Now, create an Inngest trigger that invokes the function you created above:Create a new webhook in the Inngest dashboard
In the Inngest Cloud Dashboard, navigate to the “Webhooks” tab and click the “Create Webhook” button.
Copy the webhook URL. You’ll provide this URL to Sequin when you create a consumer below.
Transform the Sequin payload into an Inngest event
Sequin will send a payload to your webhook containing the database change:You need to transform this payload into an Inngest event that triggers your function. To do so, use a “Transform” to extract the the event name and data from the Sequin payload:This will create an Inngest event with the name of the table and the action (i.e. 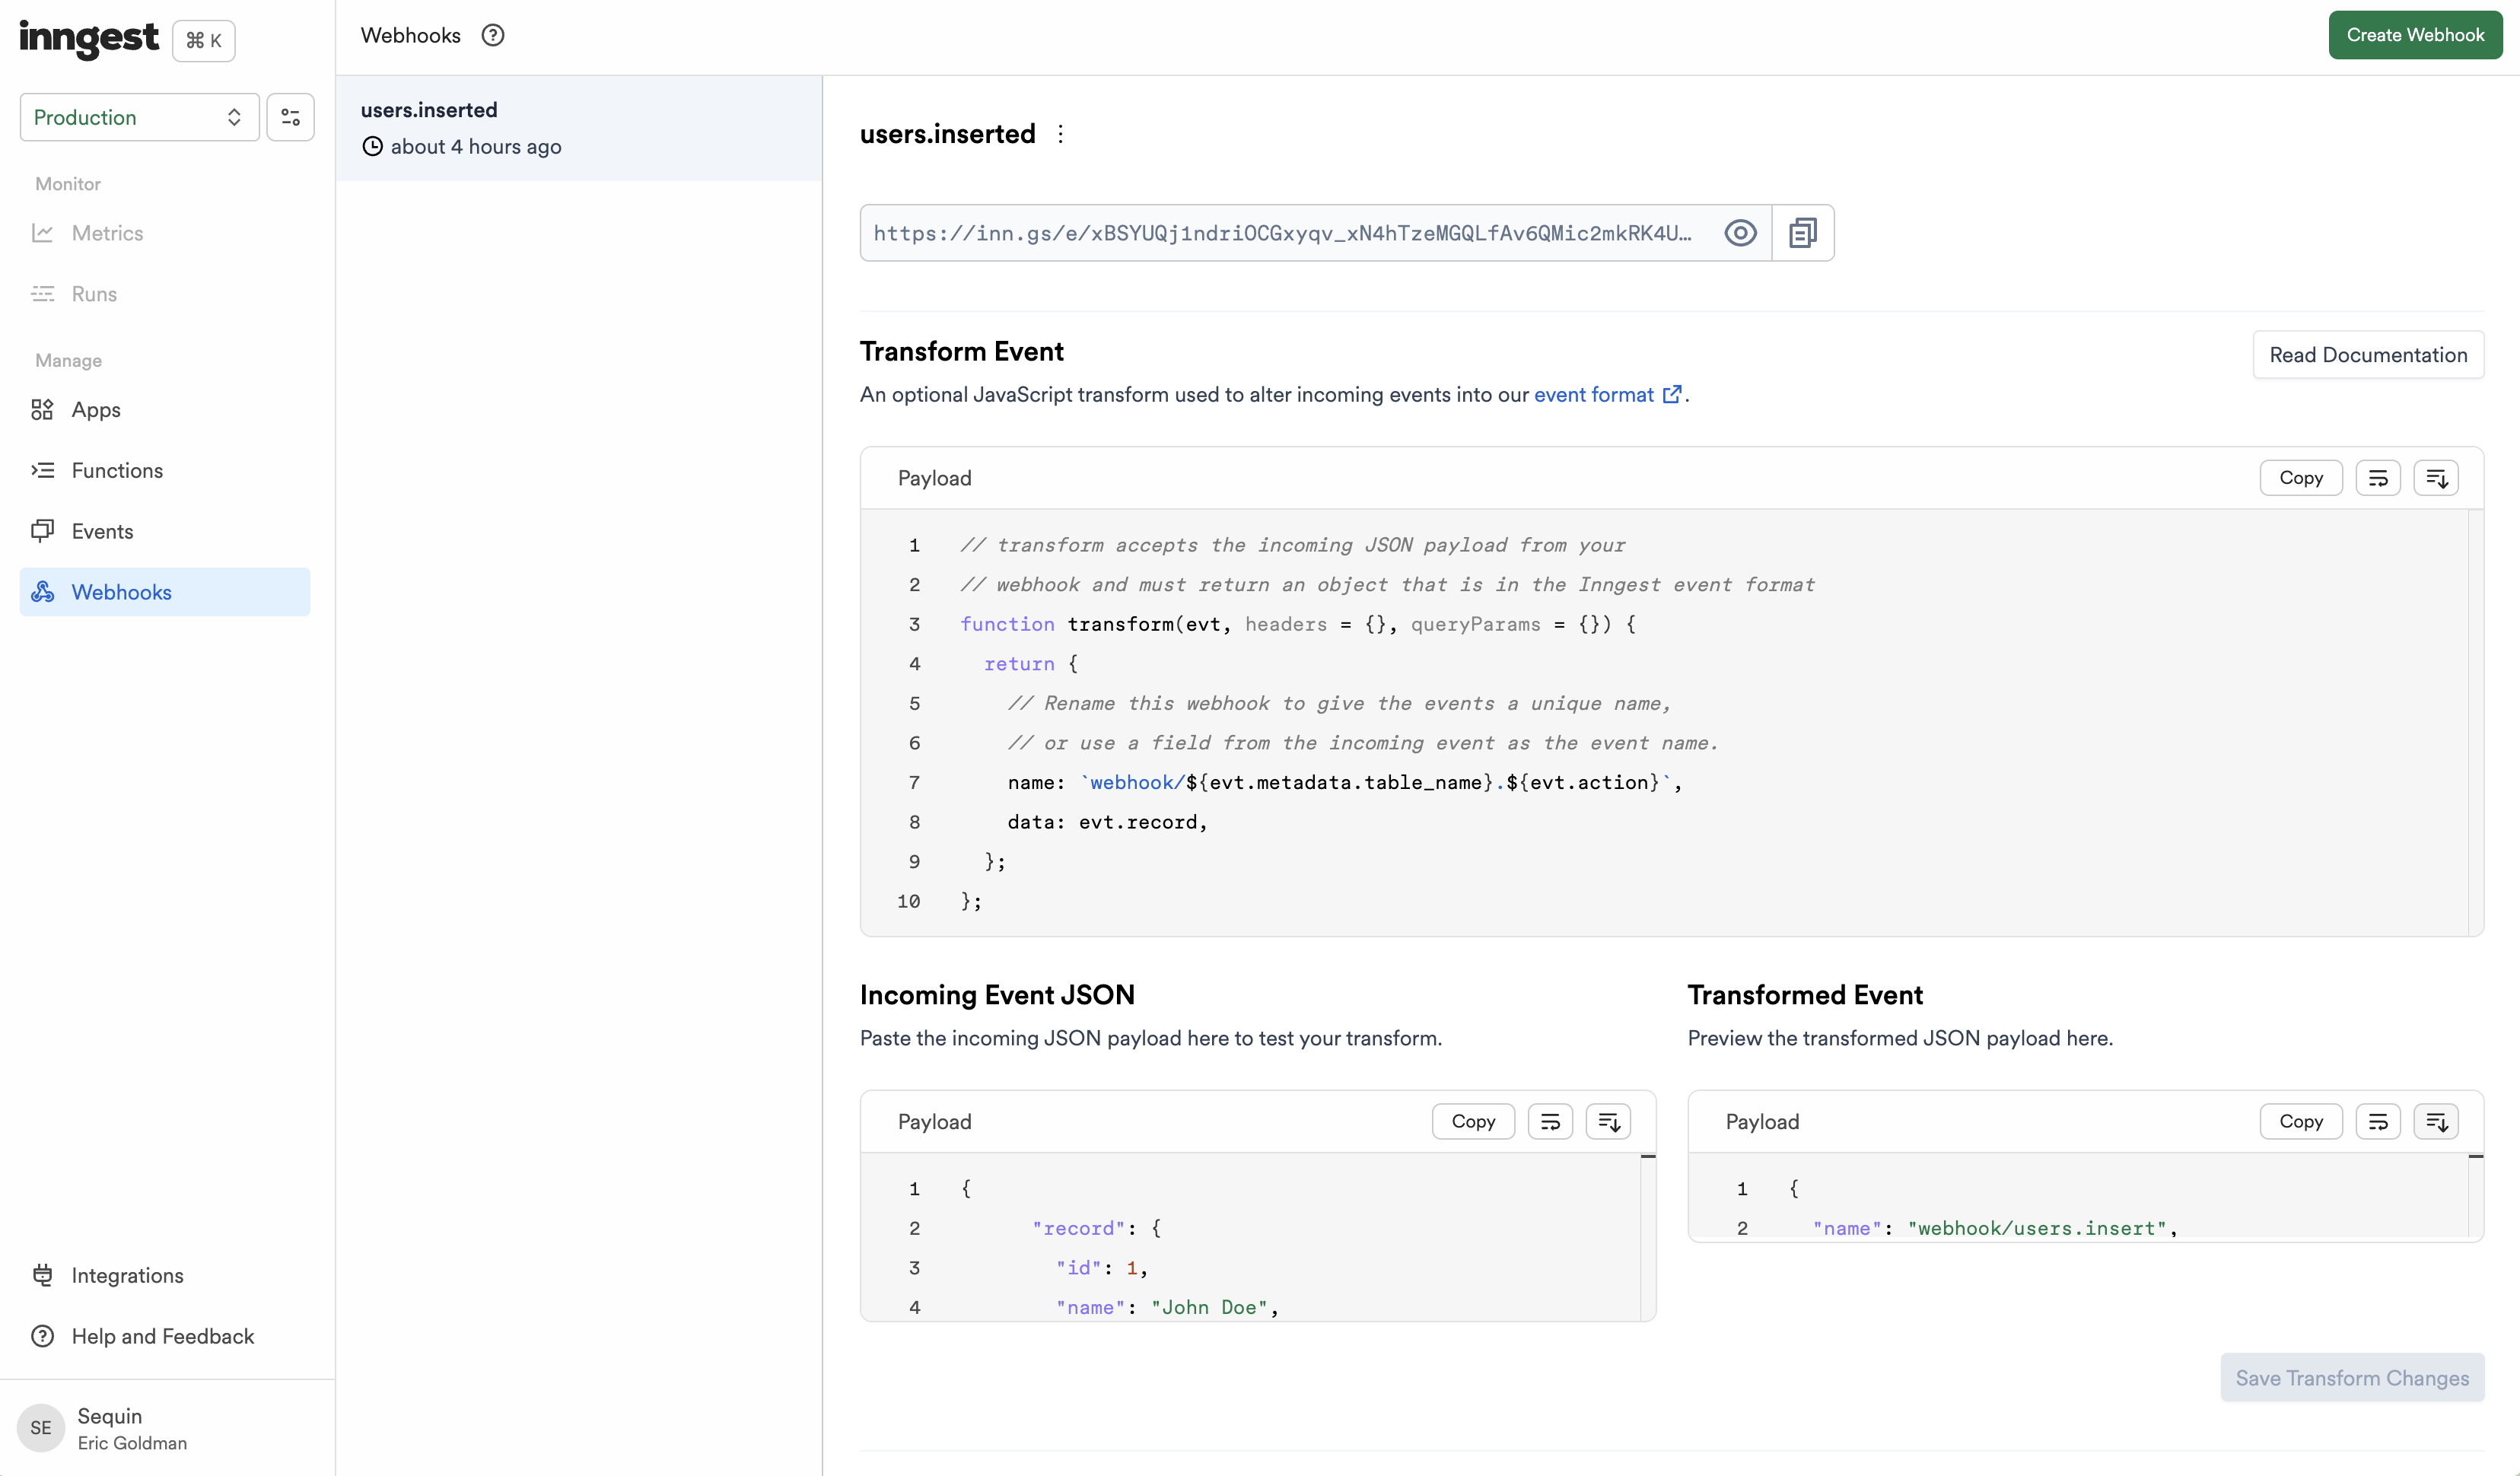
webhook/users.insert) and the data from the record field in the payload:You’ve successfully created a webhook endpoint that transforms Sequin payloads into Inngest events. In the next steps, you’ll configure a webhook sink to send events to your webhook.
Create a webhook sink
Create a webhook sink that captures changes to your database and sends a HTTP POST request to the Inngest webhook URL:Create a new sink
Navigate to the “Sinks” tab, click the “Create Sink” button, and select “Webhook Sink”.
Select source tables
Select the schemas and tables you want to capture changes from (i.e
public.users or public).Add filters (optional)
Add filters to the sink to control which database changes are sent to your webhook endpoint.
Configure backfill
You can optionally indicate if you want your webhook endpoint to receive a backfill of all or a portion of the table’s existing data. For now, leave “Backfill” toggled off.
Configure message grouping
Under “Message grouping”, leave the default option selected to ensure events for the same row are sent to your webhook endpoint in order.
Configure sink settings
Under “Webhook Sink configuration” leave the defaults:
- Leave the default value of
30000 msfor “Request timeout” as this is more than enough time for Inngest to process the request - Leave the default value of
1for “Batch size” so each change is processed individually.
Configure HTTP endpoint
Under “HTTP Endpoint”, enter the webhook URL you created in Inngest as the base URL. No additional headers are needed.
Your webhook sink is now created and ready to send events to Inngest.
Test end-to-end
Trace the change in the Sequin dashboard
In the Sequin web console, navigate to the “messages” tab for your webhook sinks and confirm that Sequin delivered the event to Inngest.
Confirm the event in the Inngest dashboard
In the Inngest Cloud dashboard, navigate to the “Events” tab, select your event (i.e., 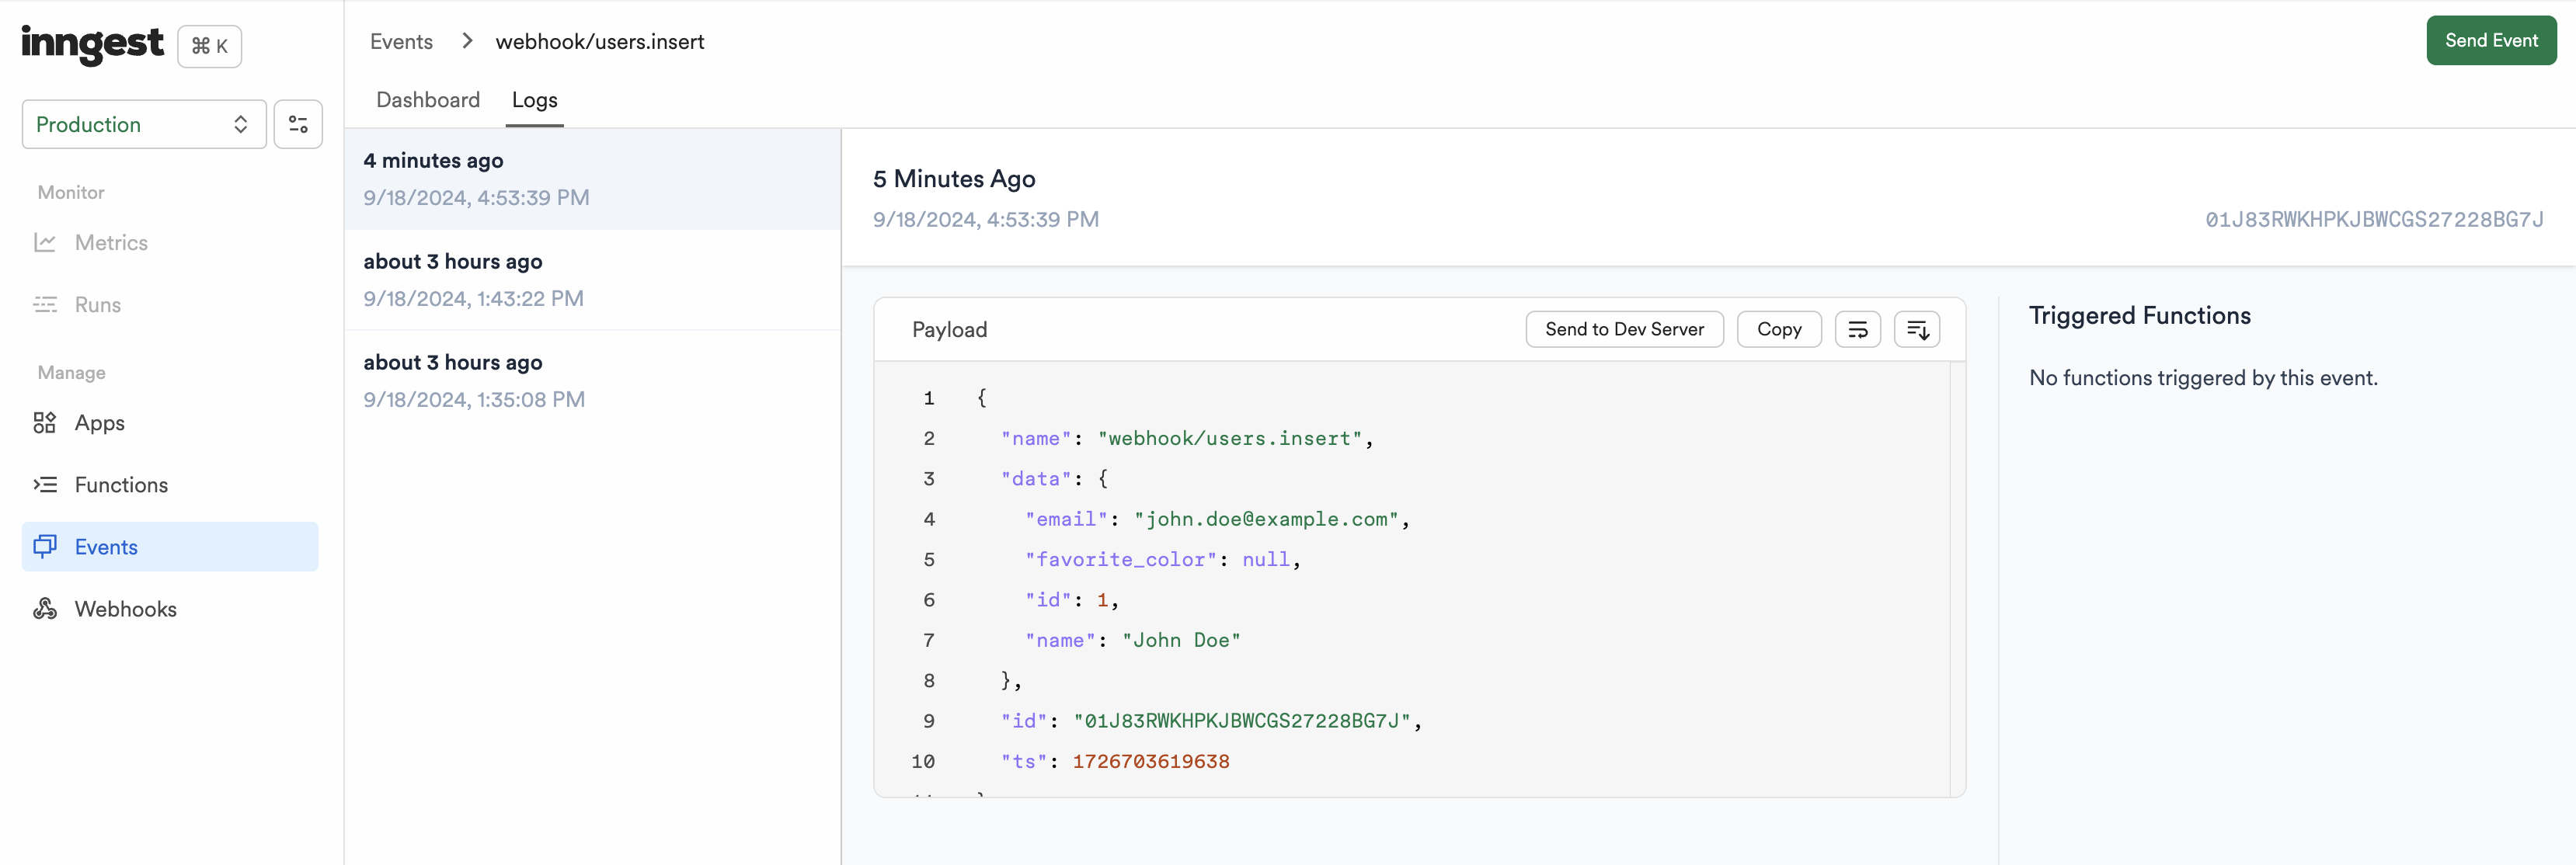
webhook/users.insert), and open the “Logs” tab. You should see the event you just created: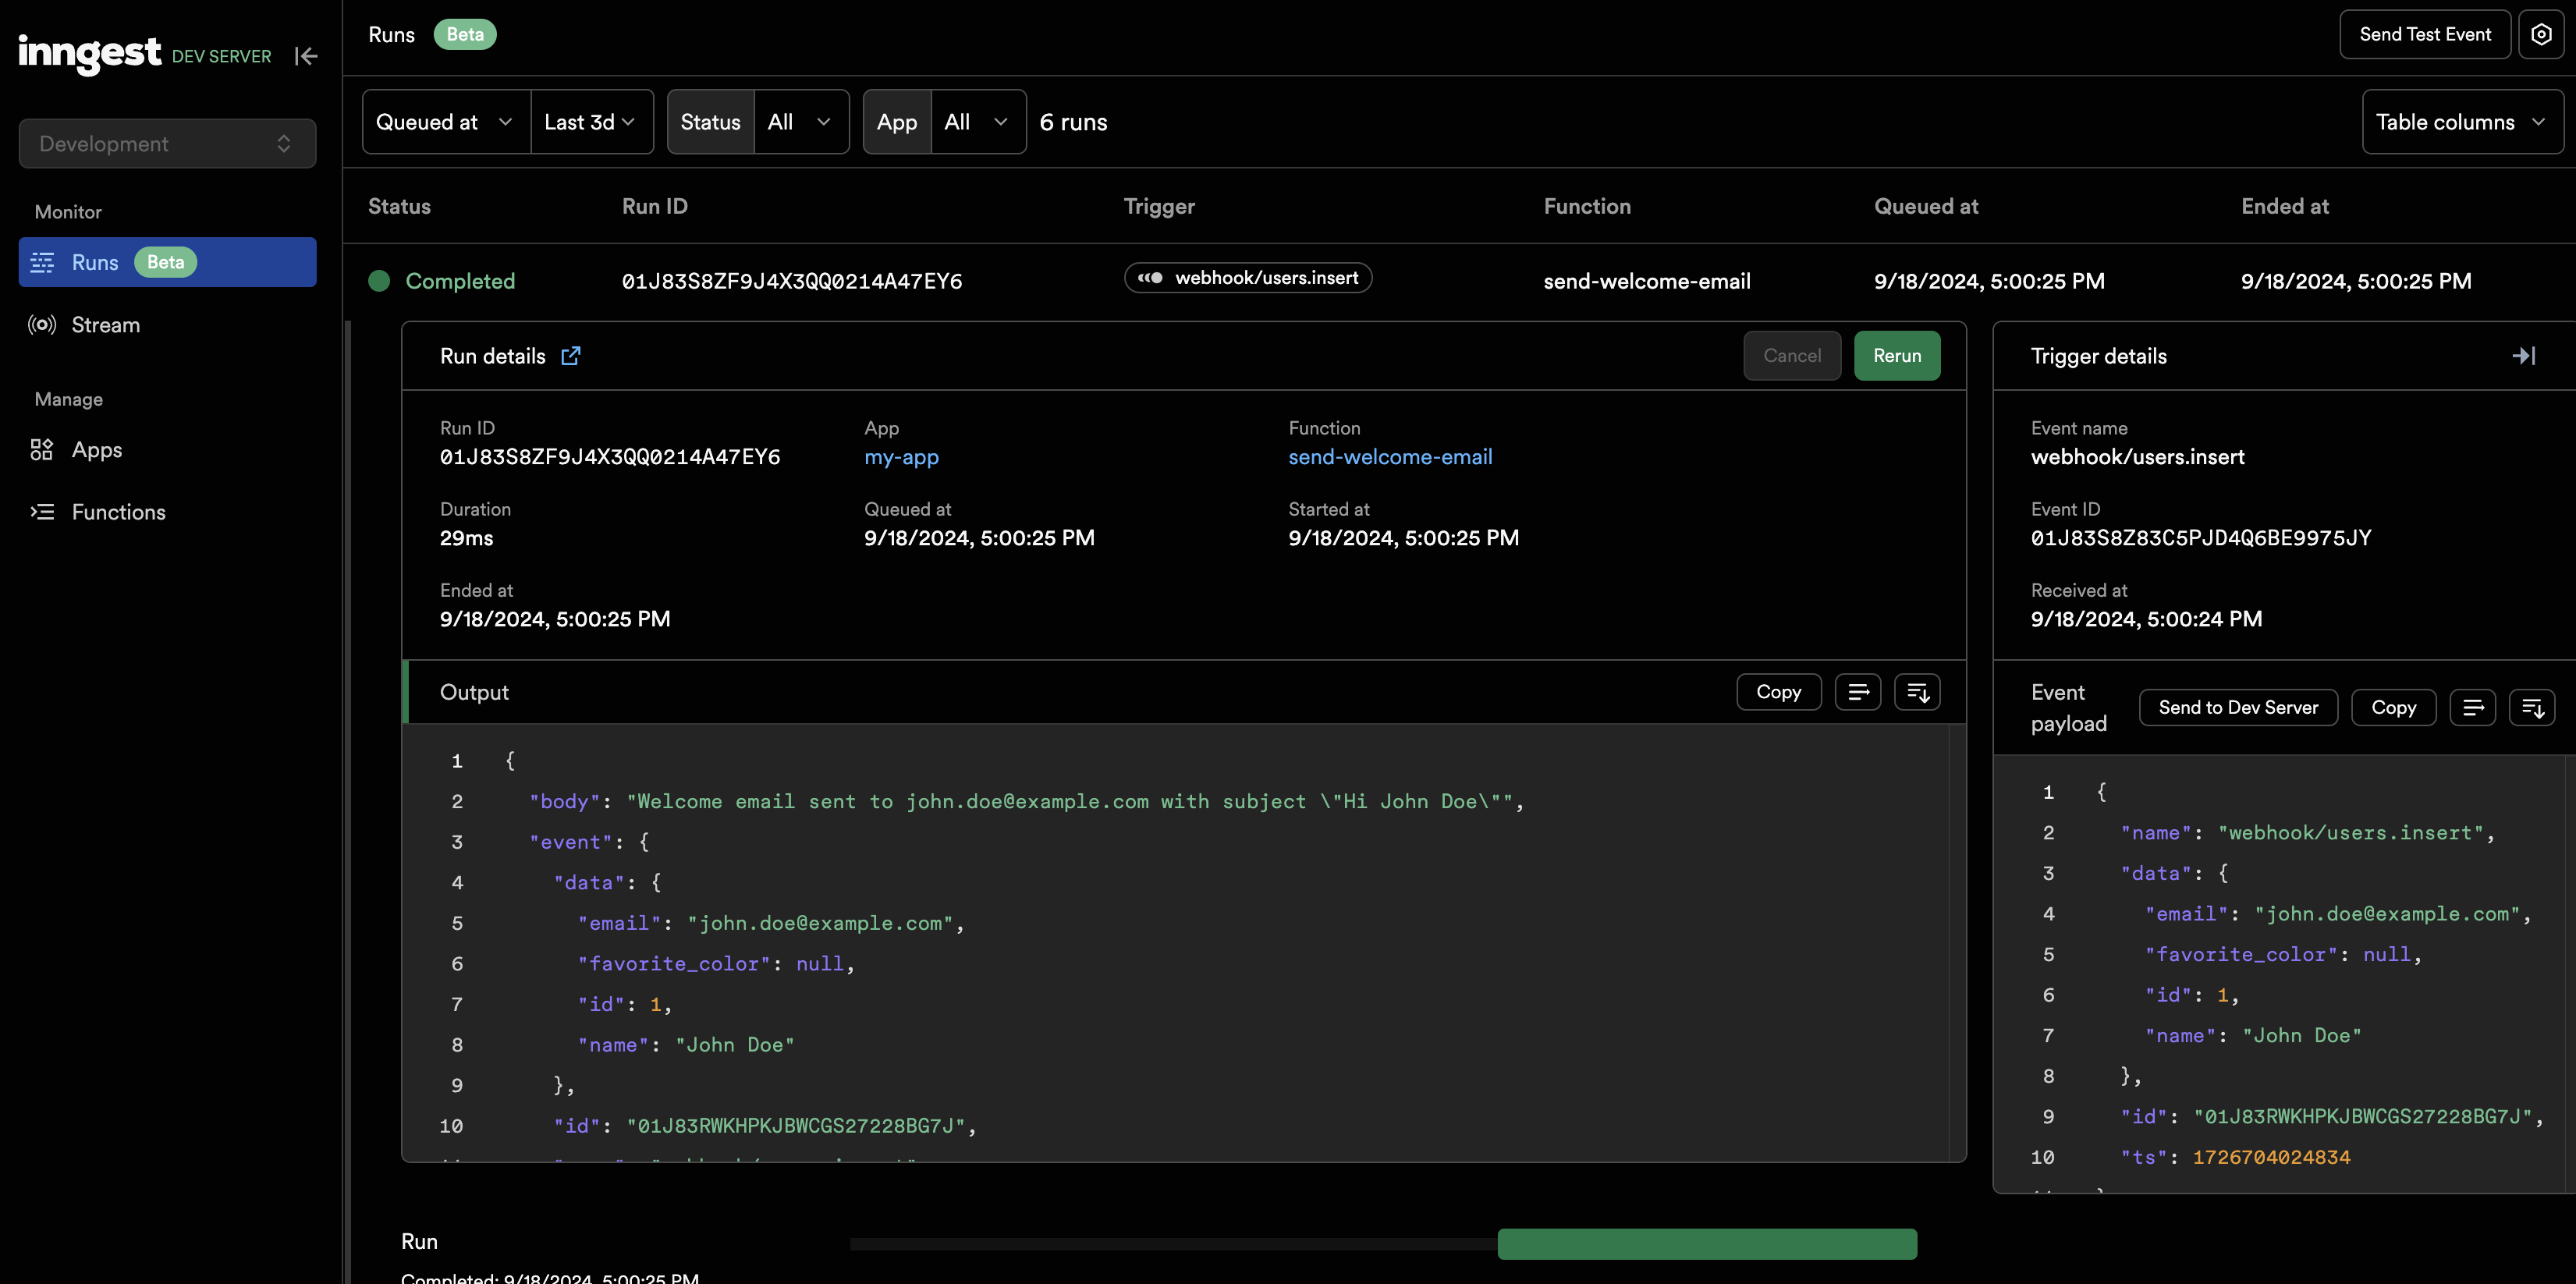
You’ve successfully created a complete workflow that captures changes from your database, triggers an Inngest event, and invokes your function.
Next steps
From here you can tailor your Sequin webhook sink and Inngest functions to cover more use cases. Then deploy your Inngest functions to production. Here are some resources to help:- Tailor your Sequin webhook sink to your use case.
- Deploy your Inngest functions to production.
- Make your Inngest functions more robust with retries, timeouts, and other features.